Since I started my macaron-baking journey earlier this year, I've never stopped thinking, "What's next?" and "What else can I create with these versatile and delicious little cookies?". I've made standard round macarons in countless flavours, experimented with different shapes, including my autumn macaron collection, and turned macarons into cakes in all sorts of sizes and designs. Somewhere along the way, I saw someone create a merry-go-round macaron cake and immediately I knew that one day I wanted to make my own version.
Last weekend, I finally materialised that little promise to myself.
And when I say I made it from scratch, I really mean from scratch. I designed all the templates myself, worked out how the structure would fit together, piped every component, filled and matured the macarons and then assembled everything into this beautiful, dreamy Merry-Go-Round Macaron Cake.
My seven-year-old daughter stayed by my side throughout the entire assembly process. She could see exactly what I was doing and watched every piece being added, yet somehow she was still so excited when the finished cake finally appeared in front of her!
I won't pretend this is a quick macaron project. It takes time, patience and a little care, but it is absolutely achievable. That's why I wanted to put together this step-by-step guide and share the templates I created so that you can make your own.
I'm already thinking about making another one for Christmas. In fact, I can almost visualise it already...
Mmm. I'll hold that thought for another day.
For now, let's make a dreamy Merry-Go-Round Macaron Cake.
First and foremost, we need to talk about structure.
Unlike an ordinary macaron cake, this design doesn't simply sit flat. We are building upwards, with several layers stacked on top of one another. That means the macarons aren't just decorative, some of them are effectively part of the architecture of the cake.
You want well-baked, reasonably full shells for this project, particularly for the large base and the round macarons that form the central column.
The bottom layers need to support everything above them, so this isn't the occasion for very fragile or severely hollow shells. The more solid and stable your components are, the easier the final assembly will be.
Don't worry if your shells have a small hollow, though. Once filled and matured, the filling can help soften and fill that space, creating a much more substantial macaron.
The filling is equally important.
For my normal macarons, I love adding a jam or fruit centre, but I deliberately avoid doing that throughout this cake. Jam contains quite a lot of moisture and can mature macaron shells quickly. That's wonderful when you want a beautifully soft individual macaron, but not necessarily when those macarons need to hold up an entire carousel!
For this cake, buttercream and ganache are your friends.
I still wanted plenty of fruit flavour, so instead of adding jam, I flavoured my buttercream with freeze-dried raspberry powder. You get lovely concentrated raspberry flavour without introducing lots of extra moisture.
I also added fresh raspberries and blueberries inside the large base cakes. They bring freshness and a little acidity to balance the sweetness, while being much easier to control than spreading a layer of jam across the shells.
The central stack of round macarons is what supports the upper layers of the cake.
The carousel horses and their chocolate poles are there to create the merry-go-round effect and connect visually between the two flower-shaped layers. They should not be relied upon to support the weight of the cake.

I use my go-to basic macaron recipe for this cake.
I've used the same ingredient ratios and method to make thousands of macarons with consistent results, so I hope it will work just as well for you.
One of the things I've always tried to do is make macaron baking feel more accessible. Macarons have a reputation for being incredibly temperamental, accompanied by a very long list of things people tell you that you must or must never do.
Over time, I've broken quite a few of those so-called rules, and my macarons still come out consistently well.
Here are a few things I do differently.
Yes, really.
I used pasteurised egg whites straight from a bottle or carton. Apart from being convenient, this means I don't have to keep wondering what on earth I'm going to do with another bowl full of egg yolks!
I don't age my egg whites either. When I first open the bottle, I might use them at room temperature, if I'm using the remainder later, they can come straight from the fridge.
The important thing is having a method that works consistently for you and bottled egg whites have worked brilliantly for me.
Another macaron rule I happily ignore.
I simply combine my fine almond flour and icing sugar thoroughly with a hand whisk before adding them to the mixture.
As long as you're using fine almond flour, I can assure you that you don't necessarily need to sift it to achieve lovely smooth macaron tops. It also saves quite a bit of time, particularly when you're making the amount of bater needed for a project like this.
I also let my KitchenAid do most of the hard work during macaronage.
I use either the whisk or paddle attachment to bring the batter close to consistency I want. I then finish it by hand with just a few final strokes so I can control the consistency precisely.
The key here is knowing when to stop. You don't want to walk away from the mixer and let it decide when your macaronage is finished.
No waiting around for an hour wondering whether the shells are dry enough. No checking the humidity. No worrying because it's raining outside.
I use the oven to dry my freshly piped shells before baking. It gives me a much more controlled process and means I can move from piping to baking relatively quickly.
I bake one tray at a time in my conventional oven without the fan, or up to four trays at once in my convection oven with the fan.
When using your own oven, remember that temperatures and baking times can vary significantly so use my timings below as a guide and adjust them to suit your oven.
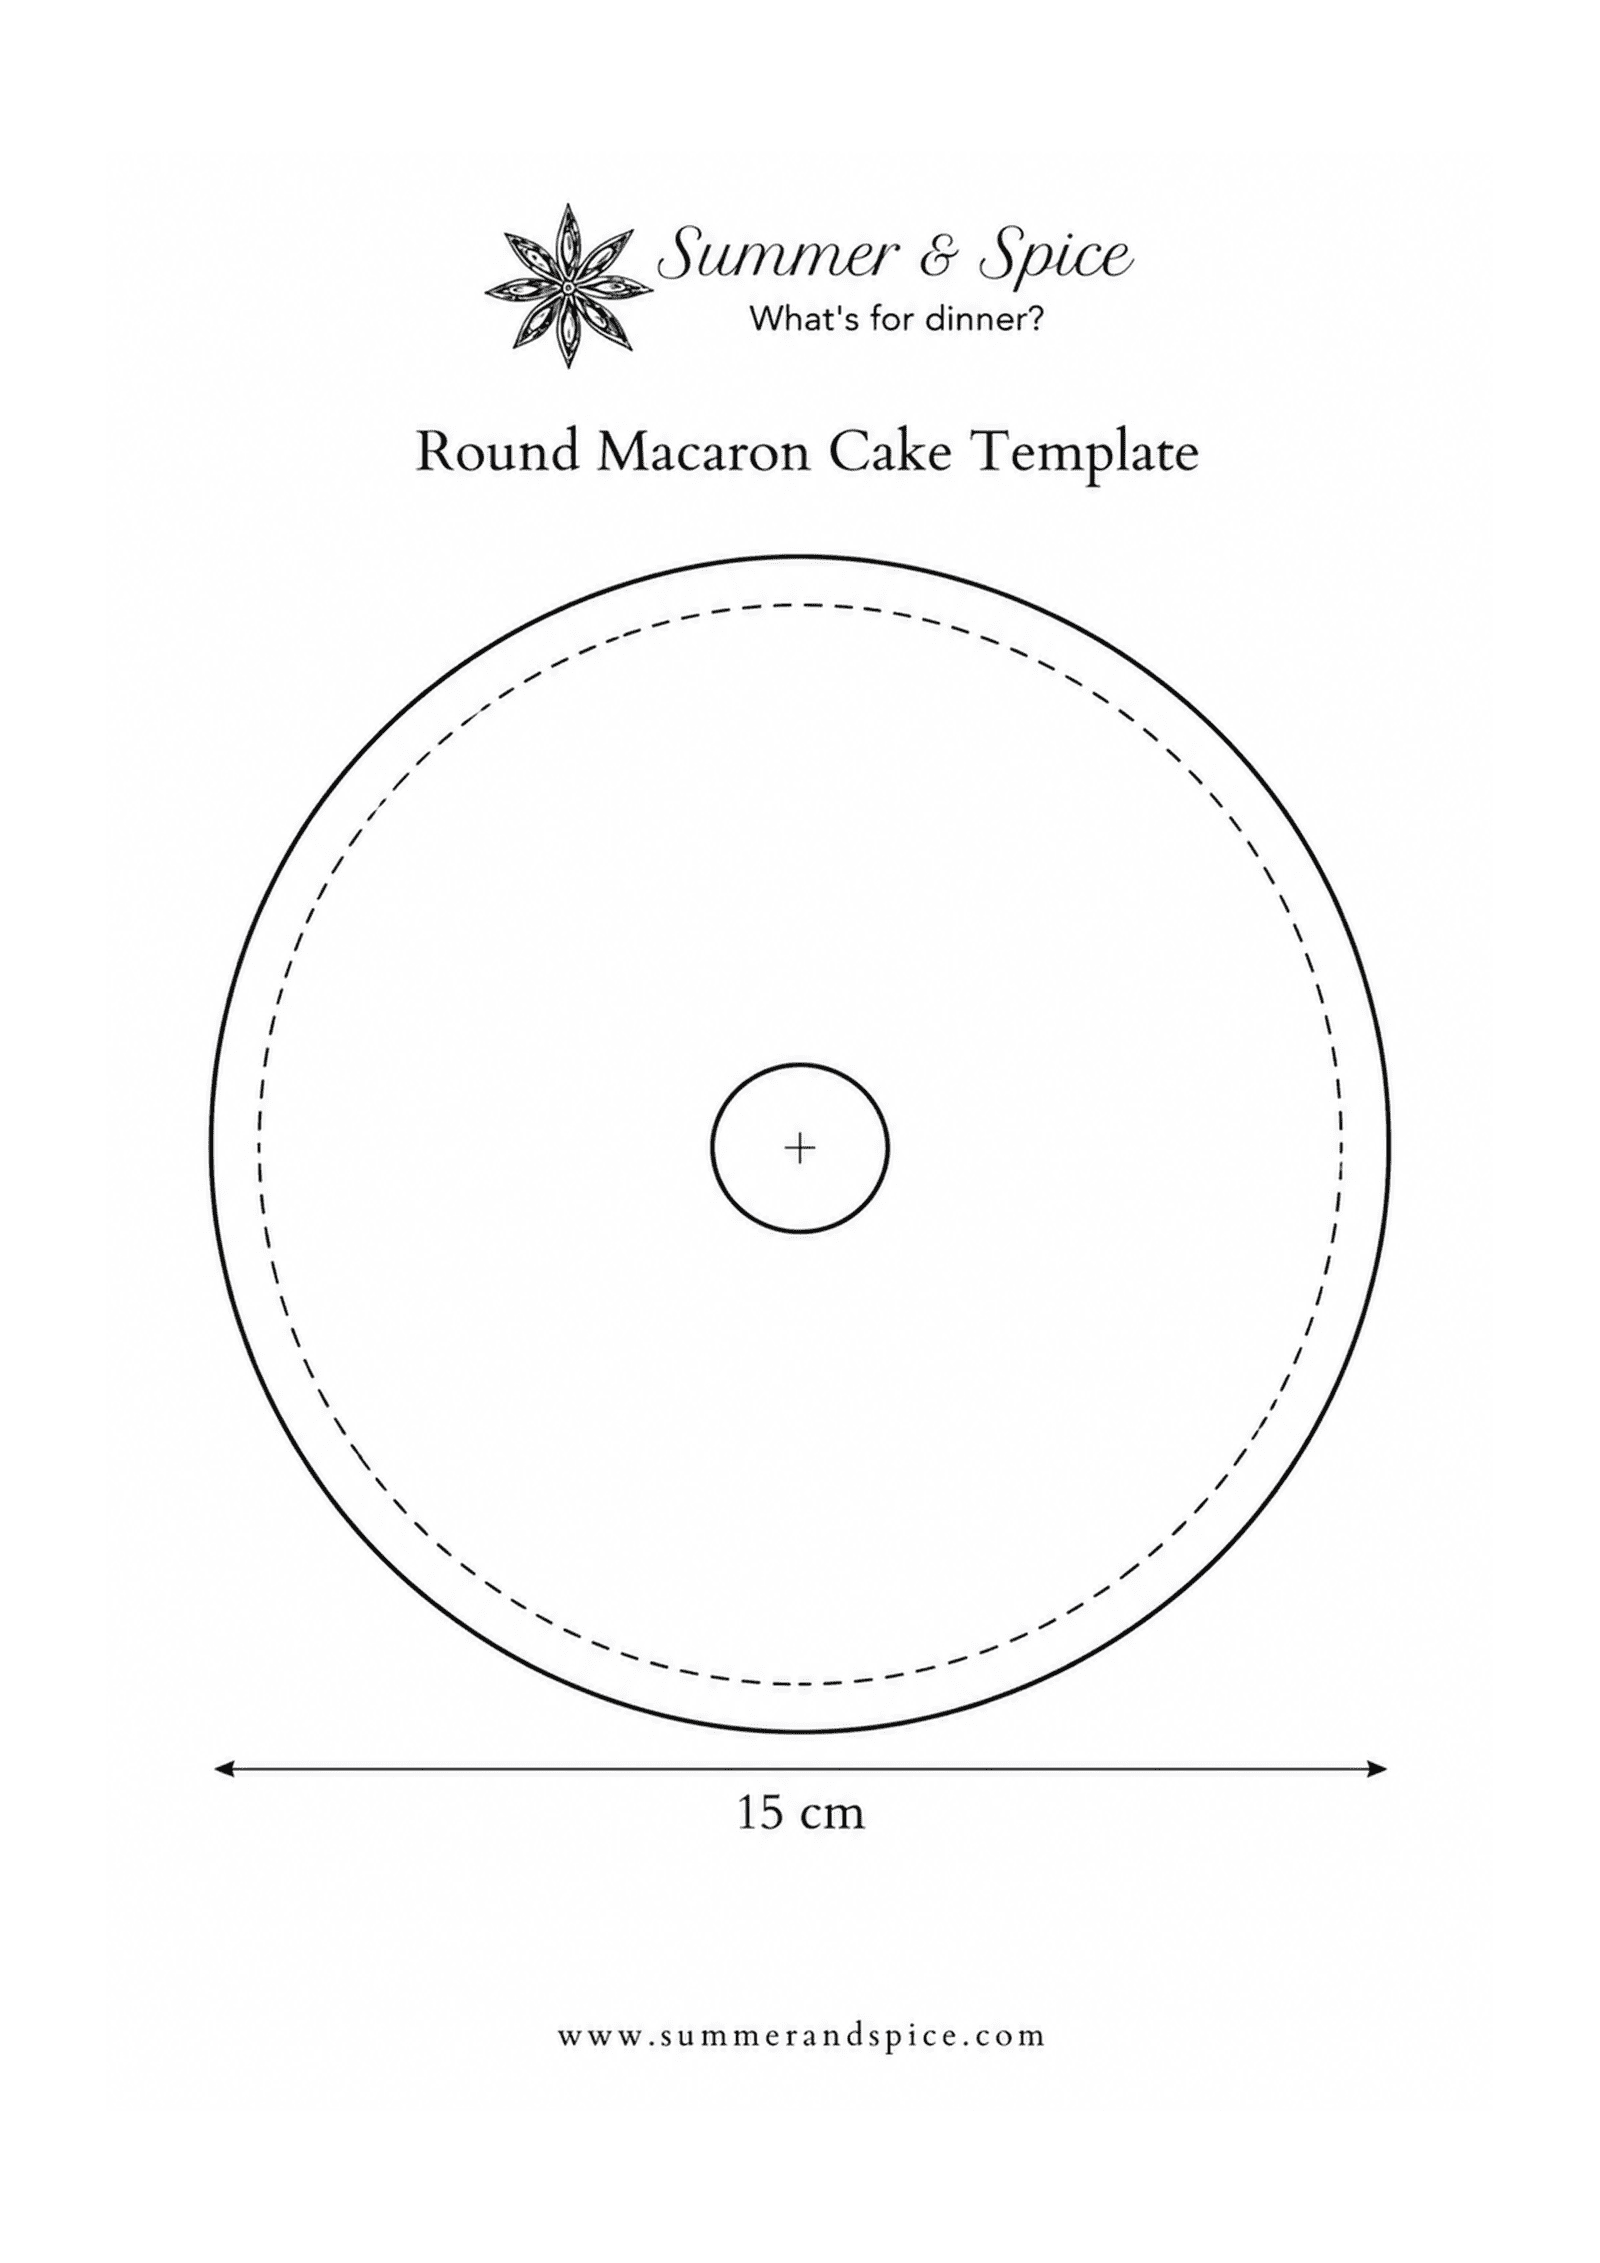
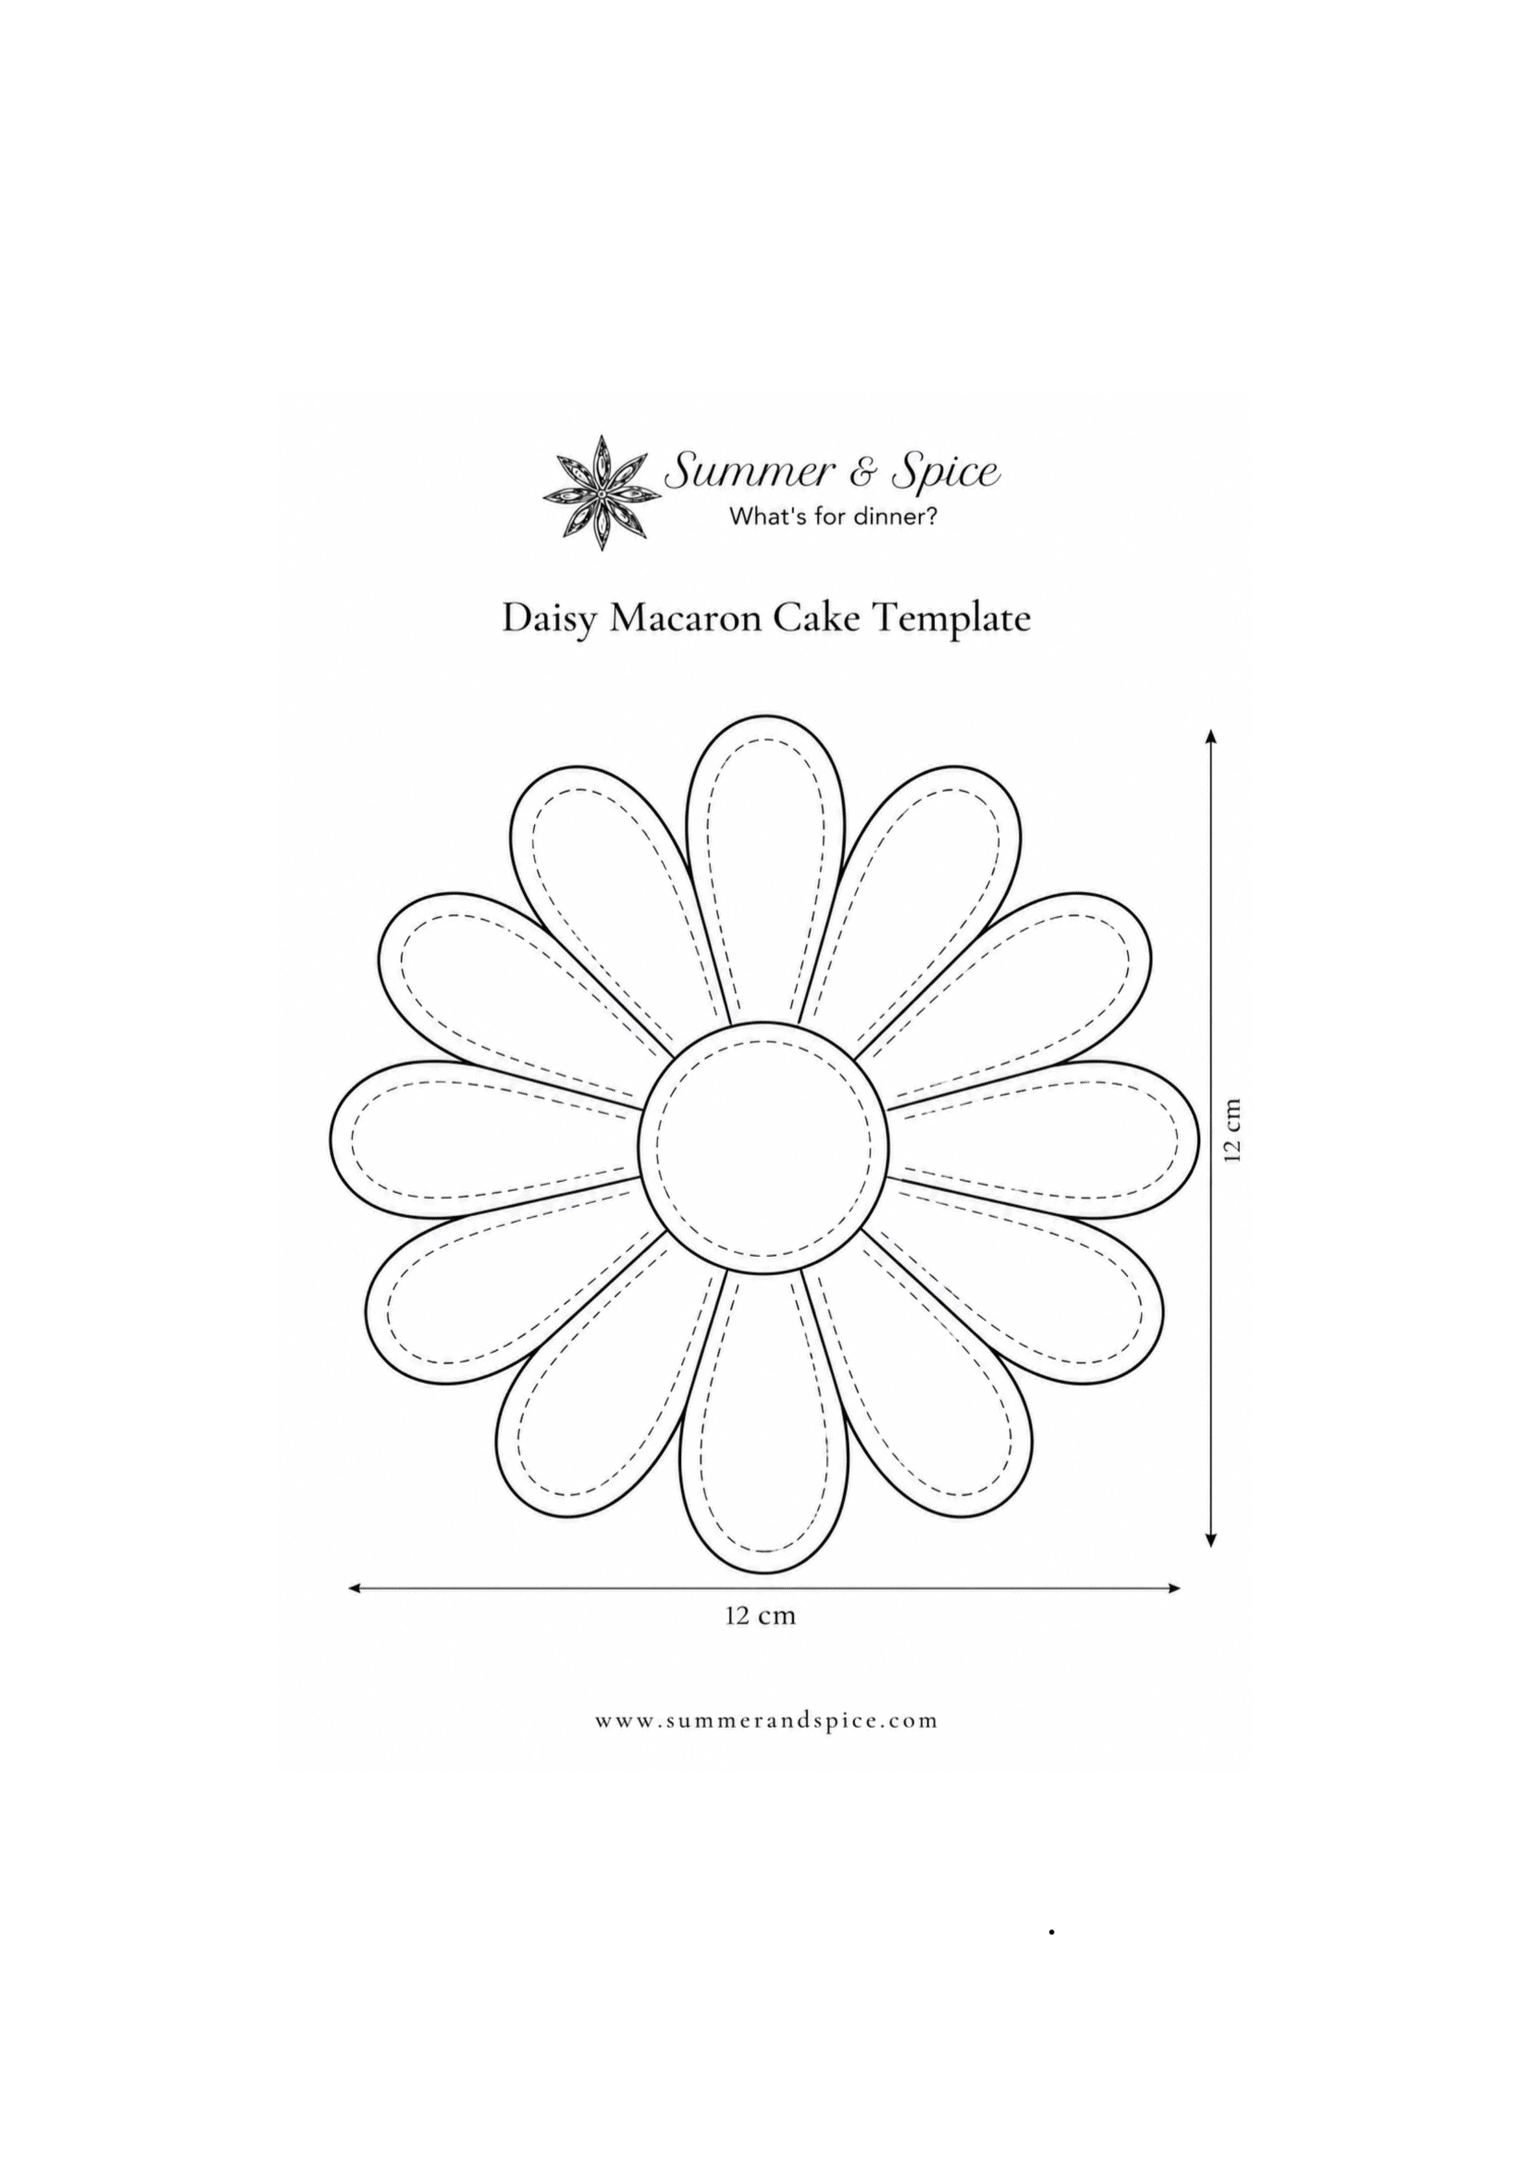
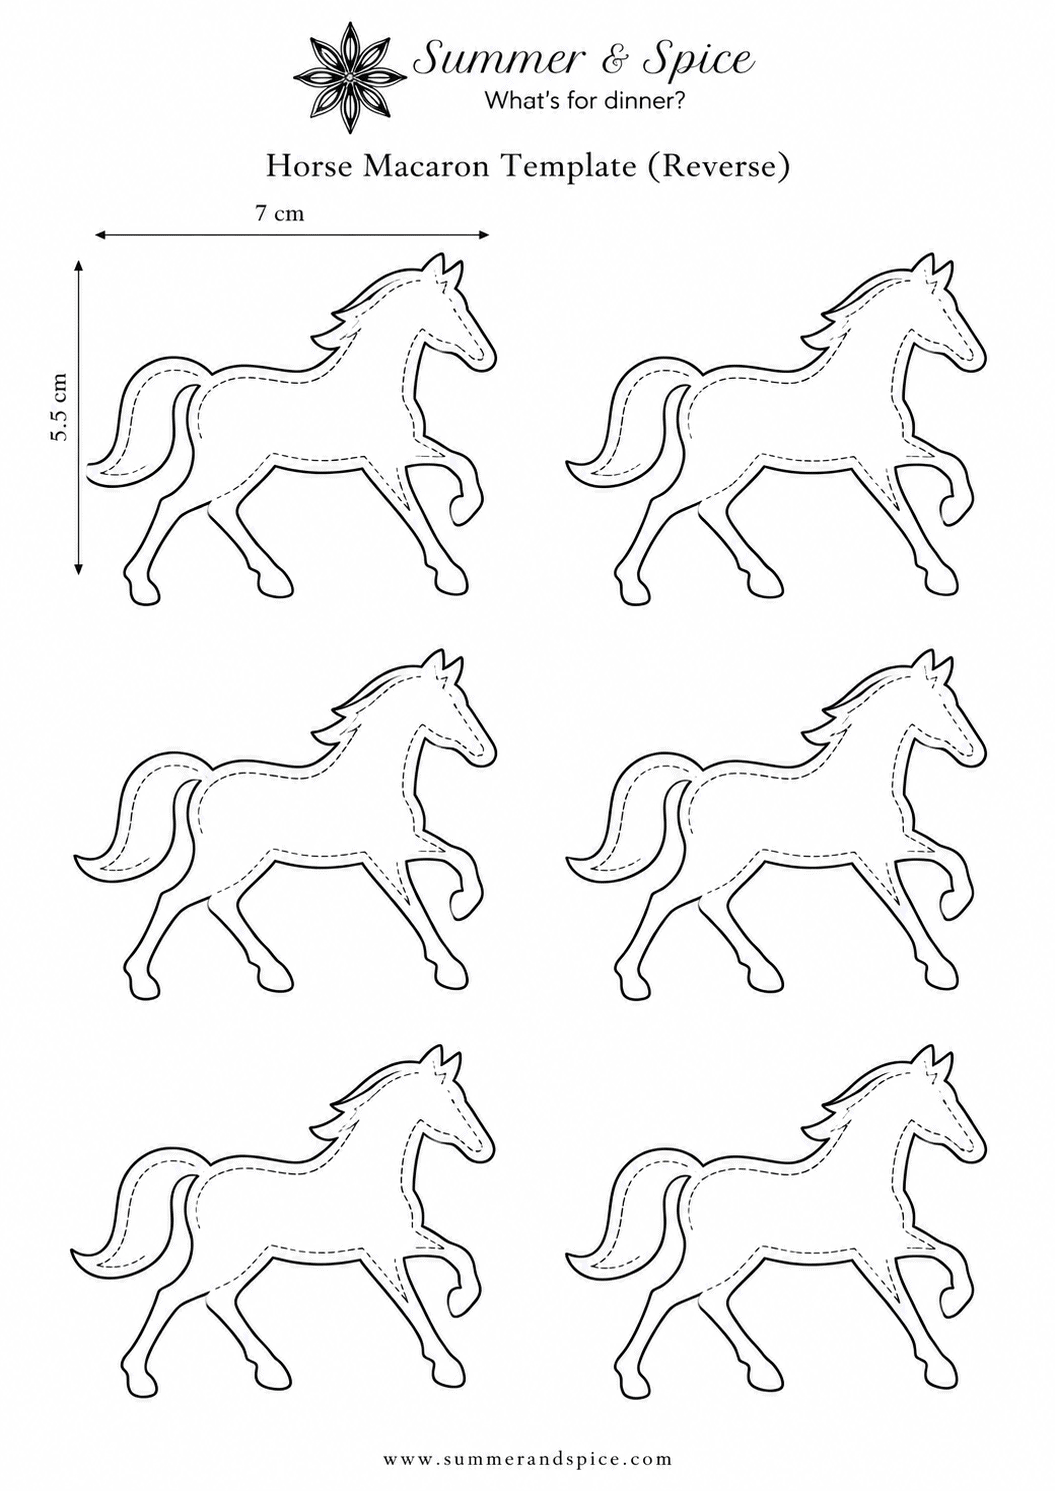
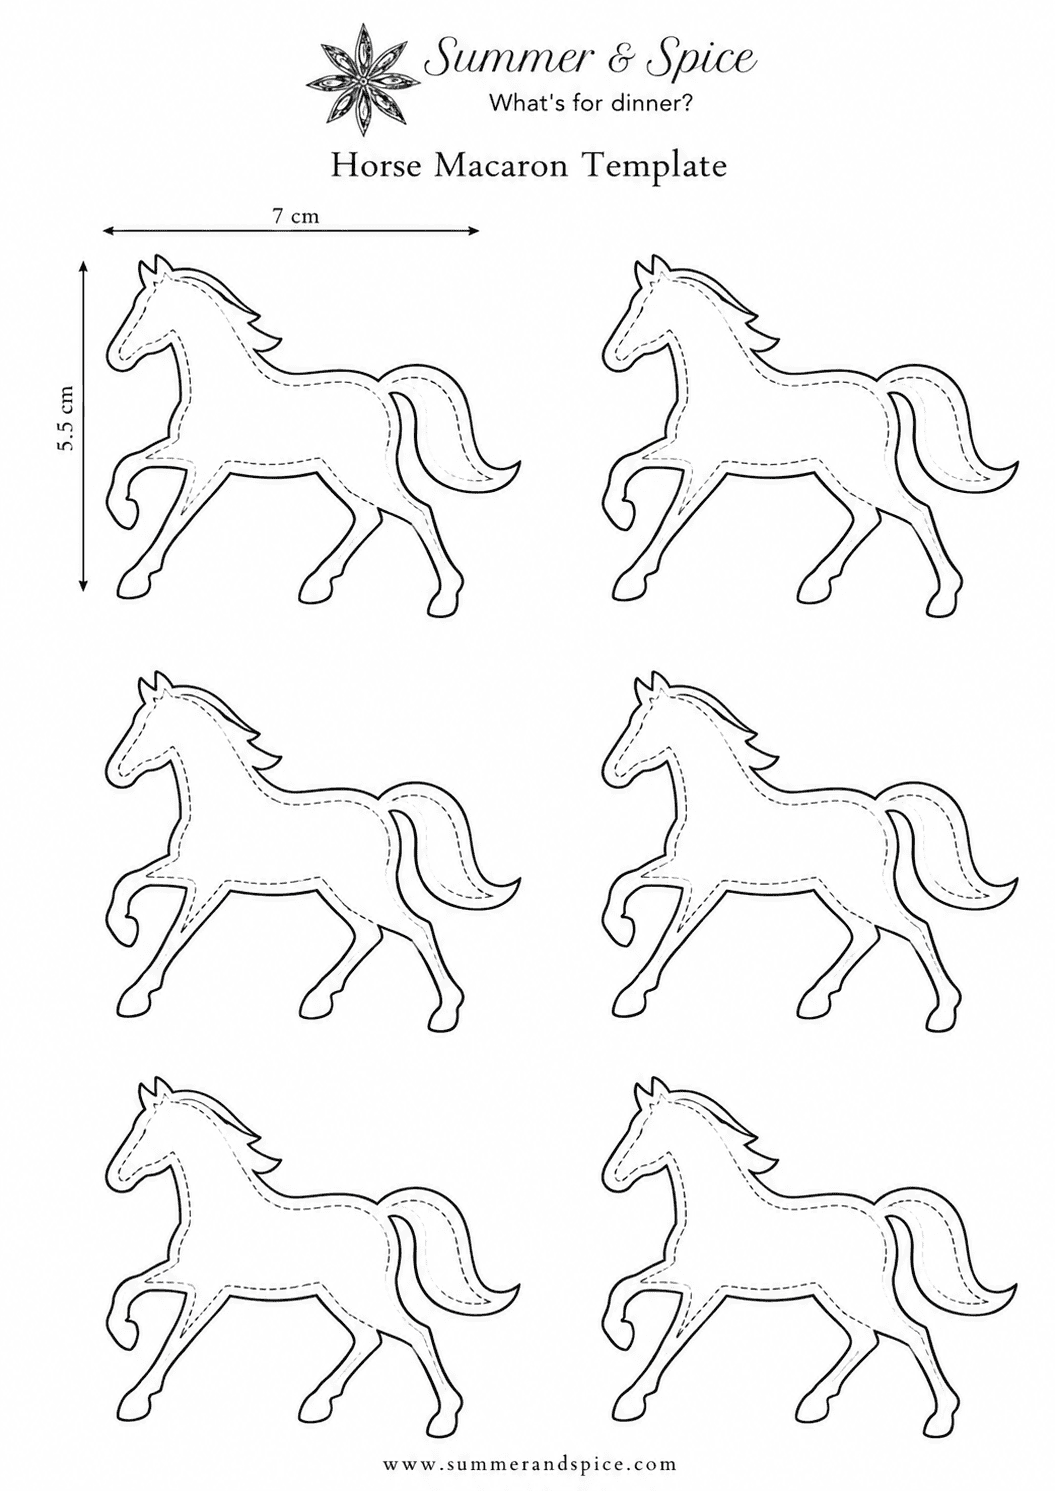
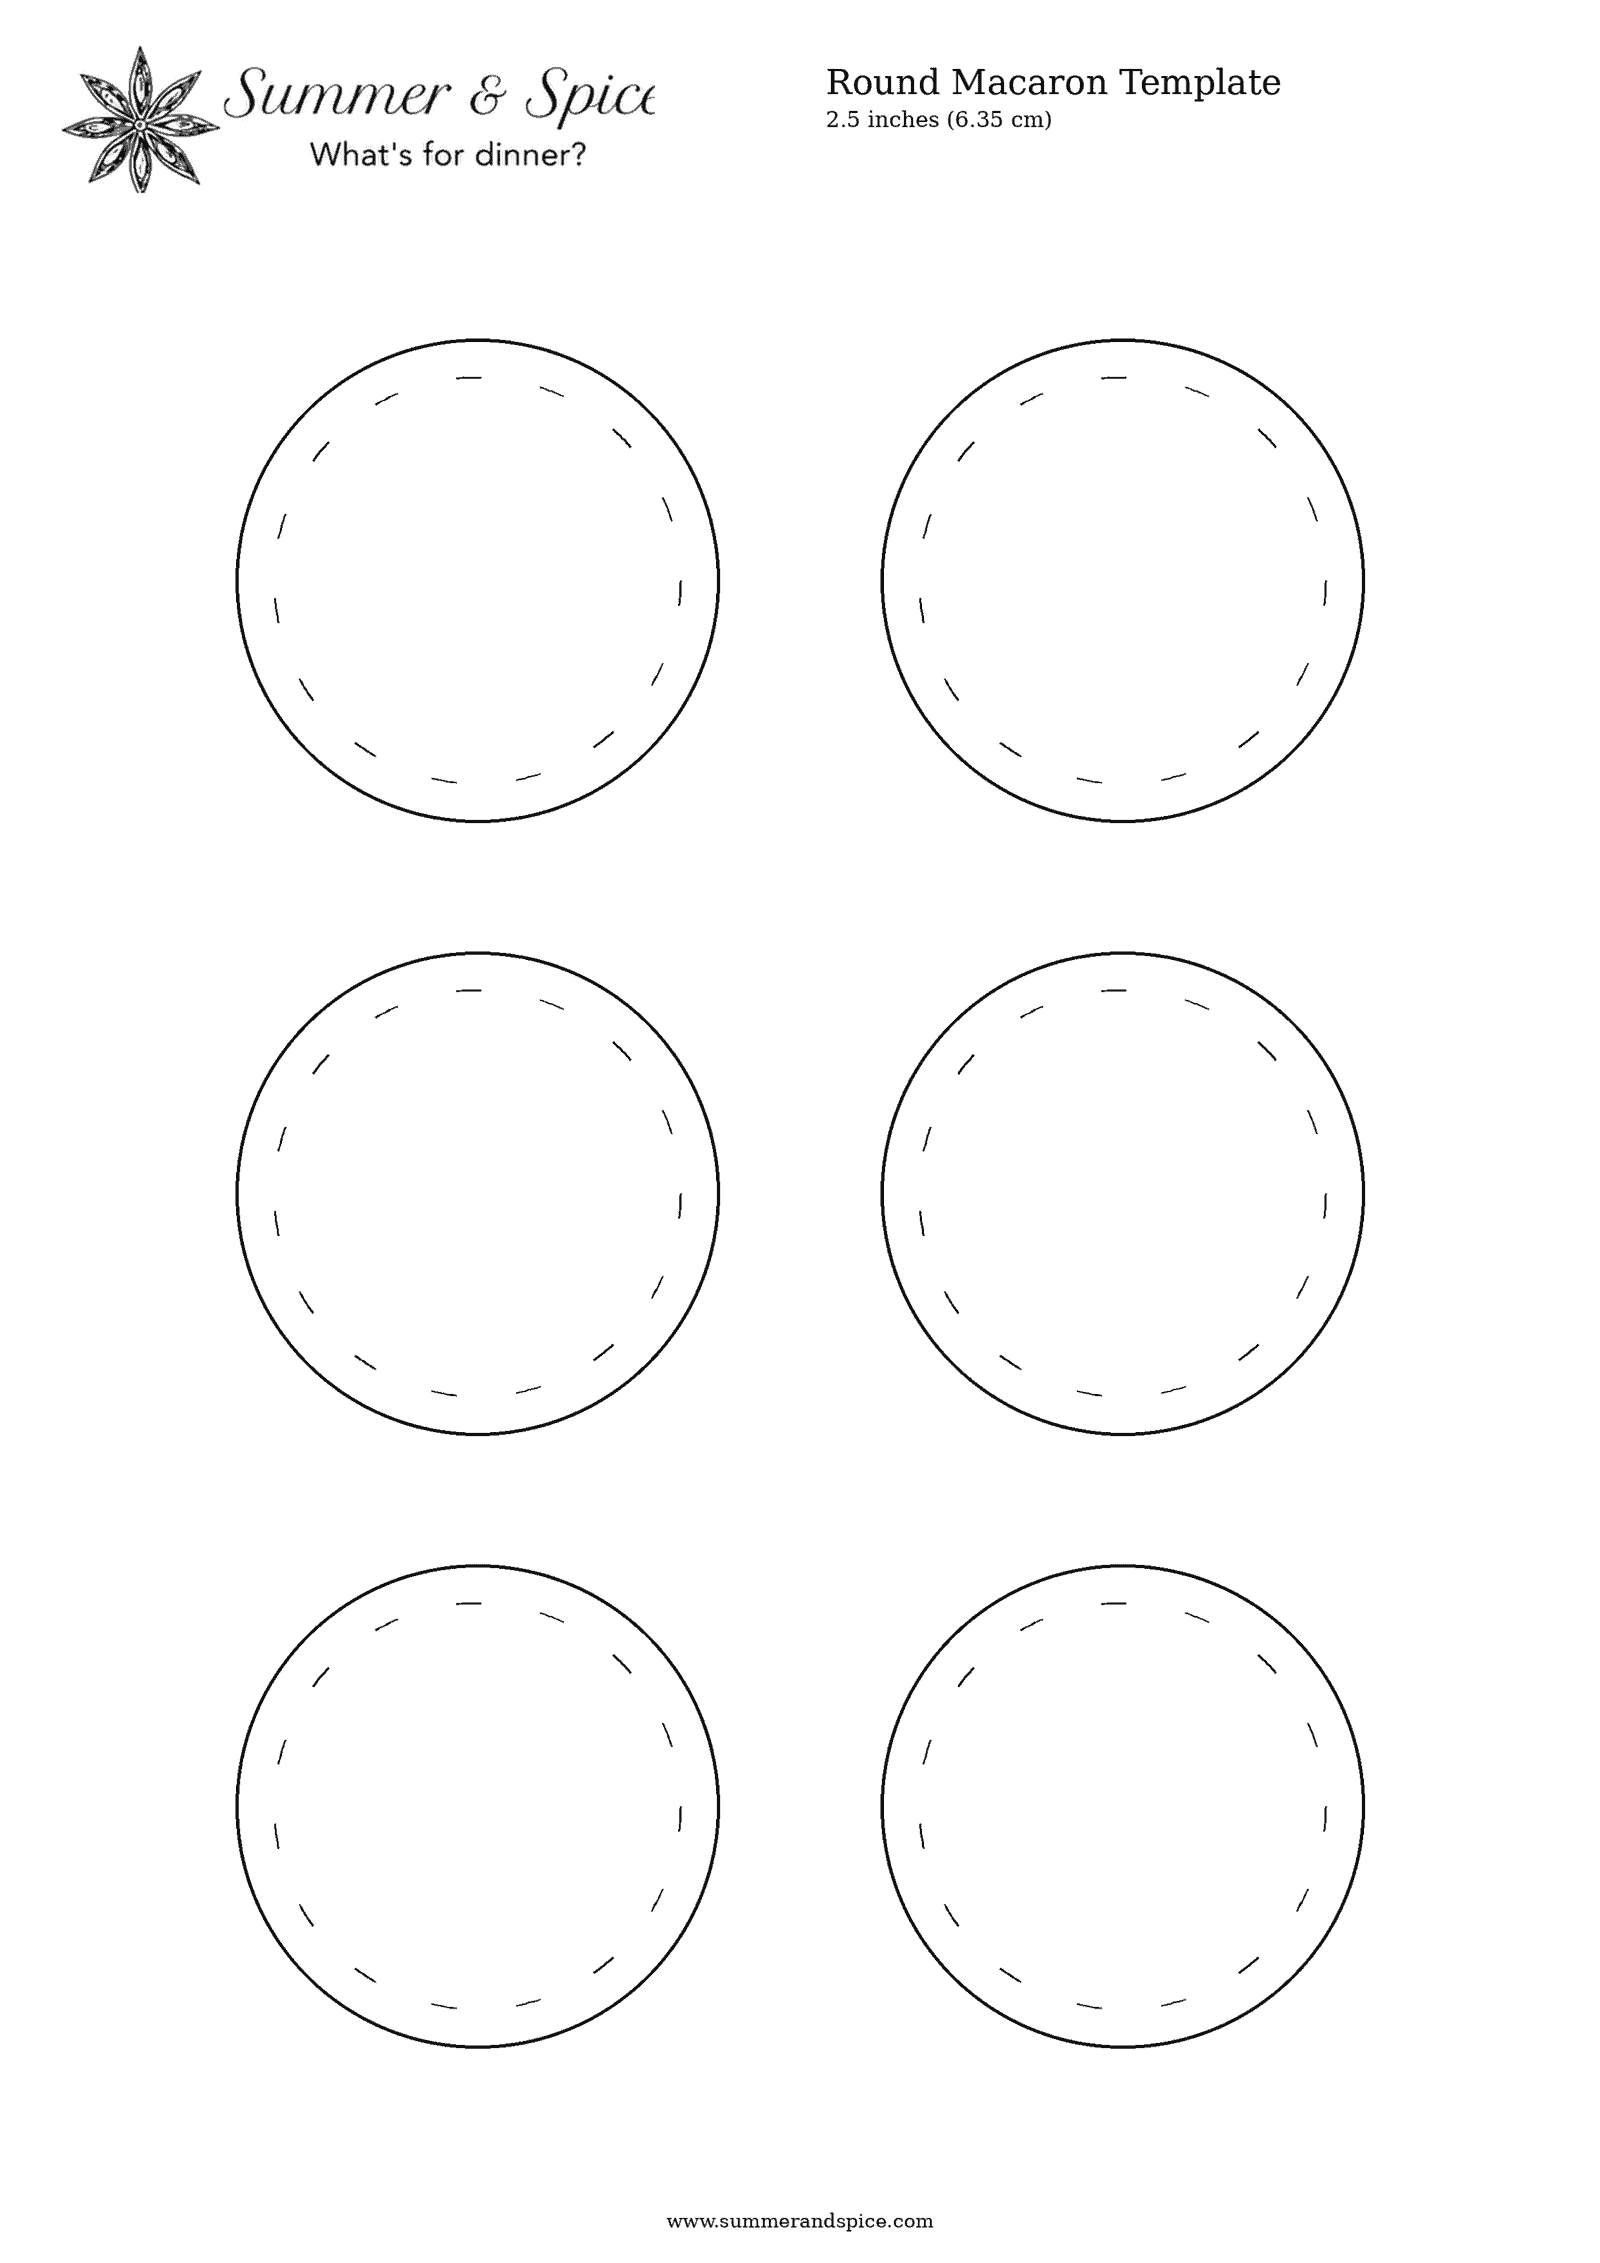
I've created a complete collection of templates for this Merry-Go-Round Macaron Cake. They are designed to be printed at actual size on A4 paper. You will need several different components.


These create the large bottom cake and form the foundation of the entire structure.
Pipe the shell from the centre, just as you would pipe a standard round macaron. I've marked the centre point on the template so you know exactly where to start.
Keep your piping bag steady and continue piping outwards in one continuous motion until the batter reaches close to the dotted line. Once you've finished piping, gently tap the tray a few times. The batter will naturally spread further and should settle towards the outer line of the template.
If you can see any air bubbles, use a toothpick to pop them and gently smooth the batter back over the spot.

You will need four flower shells, which make two filled flower-shaped macaron layers.
These have two jobs. Structurally, they give us the platform between which the carousel horses will sit. Visually, they are also one of my favourite parts of the design because they soften the overall shape and give the cake its whimsical merry-go-round appearance.
I piped the petals in pink, sage green and beige, alternating the colours to create the soft, dreamy pastel palette I wanted.


For the horses, I recommend tracing the outline of each horse with macaron batter first and then filling the centre.
I used a Wilton No. 6 nozzle because it gave me enough control to get into the smaller details of the horse shape without making the lines too bulky.
Take your time here. The horses are one of those components where precision matters more than speed. Pipe the outline, check the shape and then carefully fill the inside, making sure there aren't gaps or air pockets.

Finally, you'll need round macarons for the central column.
These might look like the simplest part of the design but they are actually some of the most important pieces because they create the vertical structure and support the upper carousel. I used three filled macrons for this part.
Try to pipe them as evenly as possible so that they stack neatly.
Because we're making components of very different sizes, they won't all have the same baking time.
My 6-inch shells take approximately 35 minutes at 140°C in a conventional oven (without fan) or at 130°C in a convection oven (with fan).
I dry the freshly piped shells in the oven for around 4 minutes then close the oven and bake them as normal.
I don't rotate the tray or disturb the shells while they're baking. At around 32-35 minute mark, check whether the shell is fully baked and stable. If necessary, give it another few minutes.
It's particularly important not to underbake the base as here we need enough strength to support the cake.
Follow the same drying and baking process. My 5-inch flower shells take approximately 30 minutes, although this will depend on your oven and the thickness of your piping.
The smaller components generally take around 22-25 minutes in my oven. Again, these timings are a guide rather than an absolute rule. Every oven behaves slightly differently so look at your macarons as well as the clock.
Allow all shells to cool completely before removing them from the banking mats and before you start filling them.
Now for the delicious part.
For this cake, I used Swiss meringue buttercream (recipe here), flavoured with freeze-dried raspberry powder.
The freeze-dried raspberry gives the buttercream a wonderful natural fruit flavour and colour without adding lots of extra moisture.
For the large base cakes, I also added fresh raspberries and blueberries between the buttercream. They give little bursts of freshness that work beautifully against the sweet macaron and creamy filling.
Whatever filling you choose, remember our structural rule: we want flavour without introducing too much moisture.
Ganache, chocolate-based fillings and stable buttercream are all excellent options.
Once filled, I recommend allowing the components to mature for approximately 12 hours in the fridge before assembling the cake.
This step is particularly helpful if any of your shells are slightly hollow. As the macarons mature, some of the moisture from the filling moves into the shells, giving them that characteristic macaron texture and helping create a more substantial component.
For the carousel poles, I used chocolate Matchmakers/Matchsticks.
I love this little shortcut because they already have the long, thin shape we need and most importantly, they're edible!
Position the chocolate poles between the horses when filling them so that each horse appears to be attached to its own carousel pole.
I use a combination of melted chocolate and buttercream when assembling the different components. Buttercream is useful for filling tiny gaps and positioning pieces while melted chocolate sets more firmly and acts almost like edible glue.
This is the exciting bit - when all those separate macarons suddenly become a cake.
Have everything prepared before you start: your filled macarons, horses, chocolate poles, melted white chocolate, buttercream and cake board.
Place the first filled 6-inch macaron cake onto your cake board. Add a small amount of buttercream underneath to stop it sliding around while you're assembling everything above it.
Check that it is sitting flat before moving on.
Place the first filled 5-inch flower macaron cake centrally on top of the base. I use a little melted white chocolate with buttercream to secure it.
Stand back and check it from different angles. Keeping every layer centred and level is really important. A tiny tilt at the bottom becomes much more noticeable once another few layers have been added.
Now stack three round macarons vertically in the centre of the flower layer. Use a small amount of melted chocolate and buttercream between each macaron to secure them. Add them one at a time and check the level after each one.
Don't rush this stage. These macarons are doing the real structural work and will support the flower layer above.
Carefully position your second filled flower macaron cake on top of the central column. Again, check it from the front, sides and above to make sure everything is level and centred before the chocolate sets.
This is also why I don't rely on the carousel horses for structural support. The central macaron column carries the weight, the horses simply connect the upper and lower flower platforms and create the carousel effect.
Place one smaller round macaron in the centre of the upper flower layer to finish the vertical structure and add a little extra height.
Now carefully position the horses and their chocolate poles between the two flower layers.
Space them evenly around the carousel and attach them to the upper and lower flower layers using a little melted chocolate. At this stage, the design really starts to come alive.
Pipe additional buttercream around the bottom or between components if you'd like to soften the joins and make the cake look more decorative.
You can also use the piping to hide any tiny imperfections. Then...step back and admire what you've made!
A Merry-Go-Round Macaron Cake made almost entirely from macarons, right down to those little carousel horses, with just a few chocolate sticks helping us create the poles.
It takes longer than making a tray of ordinary macarons, certainly. But I think that's part of the fun.
One of the reasons I've fallen so much in love with macaron making is that once you understand the basic technique, you're not limited to two little round shells with filling in between. Macarons can become leaves flowers, animals, cakes, or apparently, an entire merry-go-round!
If you decide to make this cake using my templates, I'd absolutely love to see what you create.
And as for that Christmas Merry-Go-Round Macaron Cake I mentioned earlier...I already have a few ideas.
Watch this space!